Category Archives: Data
raspbee on le potato
In short, the gpio pins are the same as on the raspberry pi, so the only thing we need to do is add the correct dt overlay and reboot.
# wget https://raw.githubusercontent.com/libre-computer-project/libretech-overlays/for-4.13.y/overlays/meson-gxl-s905x-libretech-cc-uarta.dts
# armbian-add-overlay meson-gxl-s905x-libretech-cc-uarta.dts
# reboot
The uart will now be available at /dev/ttyAML6
# dmesg | grep -i AML
[    0.000000] Machine model: Libre Computer AML-S905X-CC
[    0.000000] Kernel command line: root=UUID=cf37c48a-ba15-4e4e-9944-b06c87736116 rootwait rootfstype=ext4 splash=verbose console=ttyAML0,115200 console=tty1 consoleblank=0 coherent_pool=2M loglevel=1 ubootpart=8a0630c8-01 libata.force=noncq usb-storage.quirks=    cgroup_enable=memory swapaccount=1
[    1.328575] soc soc0: Amlogic Meson GXL (S905X) Revision 21:d (84:2) Detected
[    1.338375] c11084c0.serial: ttyAML6 at MMIO 0xc11084c0 (irq = 18, base_baud = 1500000) is a meson_uart
[    1.339501] c1108700.serial: ttyAML7 at MMIO 0xc1108700 (irq = 19, base_baud = 1500000) is a meson_uart
[    1.340352] c81004c0.serial: ttyAML0 at MMIO 0xc81004c0 (irq = 20, base_baud = 1500000) is a meson_uart
And we just tell zigbee2mqtt which device to use in the docker container.
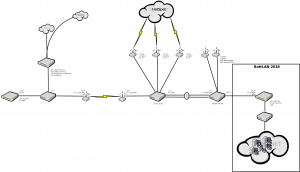
# docker run -d --name zigbee2mqtt --restart=unless-stopped --device=/dev/ttyAML6:/dev/ttyAML6 -p 8092:8080 -v /root/zigbee2mqtt/data:/app/data -v /run/udev:/run/udev:ro -e TZ=Europe/Oslo koenkk/zigbee2mqttDesign RottLAN 2018
Upgrades for Lenovo W500
For anyone interested. It is possible to upgrade your aging Lenovo W500 to 802.11ac wifi, if you have flashed your BIOS without the whitelist. Upgrades I’ve done.
– WWAN F5521GW (Still 3G, but supposedly a bit faster than the original F3507g).
– WiFi Intel 7260 (this is a half hight mini-pcie card, so you need a extension plate).
– SSD
intel amt/me debian
Endel Intel systemer idag kommer med vPro. Dette vil si at det er en slags billig iLO/iDRAC løsning integrert. Systemet jeg konfigurerte hadde en eldre versjon, som kun gir mulighet for å styre power samt konsoll over seriell. For oss er det mer enn godt nok for breakfix ved feil.
I korte trekk hva som må konfigureres.
1. IP på Intel ME firmware. Trykk F9? rett etter BIOS. I utgangspunktet kan Intel ME ligge på samme IP som host, og ta over trafikk på vei inn på maskinen. Av gammel vane liker jeg helst å separere denne trafikken helt.
2. Konfigurer grub
# If you change this file, run 'update-grub' afterwards to update

# /boot/grub/grub.cfg.

# For full documentation of the options in this file, see:

#   info -f grub -n 'Simple configuration'
GRUB_DEFAULT=0
GRUB_TIMEOUT=5
GRUB_DISTRIBUTOR=`lsb_release -i -s 2> /dev/null || echo Debian`
GRUB_CMDLINE_LINUX_DEFAULT="quiet elevator=deadline console=ttyS2,115200n8"
GRUB_CMDLINE_LINUX=""
# Uncomment to enable BadRAM filtering, modify to suit your needs
# This works with Linux (no patch required) and with any kernel that obtains
# the memory map information from GRUB (GNU Mach, kernel of FreeBSD ...)
#GRUB_BADRAM="0x01234567,0xfefefefe,0x89abcdef,0xefefefef"
# Uncomment to disable graphical terminal (grub-pc only)
GRUB_TERMINAL="console serial"
GRUB_SERIAL_COMMAND="serial --port=0xc000 --speed=115200 --word=8 --parity=no --stop=1"
# The resolution used on graphical terminal
# note that you can use only modes which your graphic card supports via VBE
# you can see them in real GRUB with the command `vbeinfo'
#GRUB_GFXMODE=640x480
# Uncomment if you don't want GRUB to pass "root=UUID=xxx" parameter to Linux
#GRUB_DISABLE_LINUX_UUID=true
# Uncomment to disable generation of recovery mode menu entries
#GRUB_DISABLE_RECOVERY="true"
# Uncomment to get a beep at grub start
#GRUB_INIT_TUNE="480 440 1"
Kort forklaring på “–port=0xc000”. Denne finner du ved å kjøre:
# dmesg |grep ttyS2 |grep irq

[    0.527818] 0000:00:03.3: ttyS2 at I/O 0xc000 (irq = 17, base_baud = 115200) is a 16550A
Ser at det stemmer med
# lspci |grep KT

00:03.3 Serial controller: Intel Corporation 82Q35 Express Serial KT Controller (rev 02)
3. Konfigurer systemd med getty.
# systemctl enable serial-getty@ttyS2.service

# systemctl start serial-getty@ttyS2.service
4. Koble til med amttool / amtterm
# export AMT_PASSWORD=passw0rd

# amttool hostname

### AMT info on machine 'hostname' ###

AMT version:  3.2.3

Use of uninitialized value $domainname in printf at /bin/amttool line 244.

Hostname:     hostname.

Powerstate:   S0

Remote Control Capabilities:

    IanaOemNumber                   0

    OemDefinedCapabilities          IDER SOL BiosSetup

    SpecialCommandsSupported        PXE-boot HD-boot cd-boot

    SystemCapabilitiesSupported     powercycle powerdown powerup reset

    SystemFirmwareCapabilities      0

# amtterm hostname

amtterm: NONE -> CONNECT (connection to host)

ipv4 hostname [192.168.2.3] 16994 open

amtterm: CONNECT -> INIT (redirection initialization)

amtterm: INIT -> AUTH (session authentication)

amtterm: AUTH -> INIT_SOL (serial-over-lan initialization)

amtterm: INIT_SOL -> RUN_SOL (serial-over-lan active)

serial-over-lan redirection ok

connected now, use ^] to escape
Debian GNU/Linux 8 hostname ttyS2
hostname login:
Kan også nå web interface for å styre power, se på events osv på port 16992. eks http://192.168.2.3:16992/
Kilder:
https://linux.die.net/man/7/amt-howto
https://wiki.debian.org/AMT/SerialOverLan
http://0pointer.de/blog/projects/serial-console.html
https://en.wikipedia.org/wiki/Intel_AMT_versions
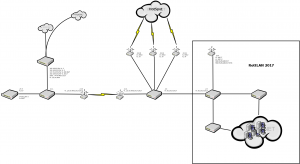
Design RottLAN 2017
Utvide ZFS pool med ny RAIDZ VDEV
Rimelig rett frem, det vil riktignok ikke være noen rebalansering av data, så dette må en ta seg av selv. Fordelen er jo at kommandoen er ferdig på sekunder og plassen kan utnyttes umiddelbart.
Først kjørte jeg kommandoen med oppsjonen “-n” for å være sikker på at den var korrekt.
# zpool add -n tank raidz ata-HGST_HDN724040ALE640_PK1381PCJSZ50S-part4 ata-HGST_HDN724040ALE640_PK1381PCJT6EWS-part4 ata-HGST_HDN724040ALE640_PK1381PCK3N9DS-part4 ata-HGST_HDN724040ALE640_PK1381PCKZ840S-part4

would update 'tank' to the following configuration:

	tank

	  raidz1

	    ata-HGST_HDS724040ALE640_PK1334PBGX5SJS-part4

	    ata-HGST_HDS724040ALE640_PK1334PBGY417S-part4

	    ata-HGST_HDS724040ALE640_PK1334PBHJT8NP-part4

	    ata-HGST_HDS724040ALE640_PK1334PBHJT9UP-part4

	  raidz1

	    ata-HGST_HDN724040ALE640_PK1381PCJSZ50S-part4

	    ata-HGST_HDN724040ALE640_PK1381PCJT6EWS-part4

	    ata-HGST_HDN724040ALE640_PK1381PCK3N9DS-part4

	    ata-HGST_HDN724040ALE640_PK1381PCKZ840S-part4

	logs

	  mirror

	    ata-Samsung_SSD_840_EVO_250GB_S1DBNSBF485213N-part5

	    ata-Samsung_SSD_840_EVO_250GB_S1DBNSBF485216D-part5

	cache

	  ata-Samsung_SSD_840_EVO_250GB_S1DBNSBF485213N-part6

	  ata-Samsung_SSD_840_EVO_250GB_S1DBNSBF485216D-part6
Ser riktig ut, så da kjører vi kommandoen.
# zpool add tank raidz ata-HGST_HDN724040ALE640_PK1381PCJSZ50S-part4 ata-HGST_HDN724040ALE640_PK1381PCJT6EWS-part4 ata-HGST_HDN724040ALE640_PK1381PCK3N9DS-part4 ata-HGST_HDN724040ALE640_PK1381PCKZ840S-part4

# zpool status

  pool: tank

 state: ONLINE

  scan: scrub repaired 0 in 21h19m with 0 errors on Sat Aug 15 01:49:26 2015

config:
NAME STATE READ WRITE CKSUM
tank ONLINE 0 0 0
raidz1-0 ONLINE 0 0 0
ata-HGST_HDS724040ALE640_PK1334PBGX5SJS-part4 ONLINE 0 0 0
ata-HGST_HDS724040ALE640_PK1334PBGY417S-part4 ONLINE 0 0 0
ata-HGST_HDS724040ALE640_PK1334PBHJT8NP-part4 ONLINE 0 0 0
ata-HGST_HDS724040ALE640_PK1334PBHJT9UP-part4 ONLINE 0 0 0
raidz1-2 ONLINE 0 0 0
ata-HGST_HDN724040ALE640_PK1381PCJSZ50S-part4 ONLINE 0 0 0
ata-HGST_HDN724040ALE640_PK1381PCJT6EWS-part4 ONLINE 0 0 0
ata-HGST_HDN724040ALE640_PK1381PCK3N9DS-part4 ONLINE 0 0 0
ata-HGST_HDN724040ALE640_PK1381PCKZ840S-part4 ONLINE 0 0 0
logs
mirror-1 ONLINE 0 0 0
ata-Samsung_SSD_840_EVO_250GB_S1DBNSBF485213N-part5 ONLINE 0 0 0
ata-Samsung_SSD_840_EVO_250GB_S1DBNSBF485216D-part5 ONLINE 0 0 0
cache
ata-Samsung_SSD_840_EVO_250GB_S1DBNSBF485213N-part6 ONLINE 0 0 0
ata-Samsung_SSD_840_EVO_250GB_S1DBNSBF485216D-part6 ONLINE 0 0 0
errors: No known data errors
# zpool list tank
NAME SIZE ALLOC FREE EXPANDSZ FRAG CAP DEDUP HEALTH ALTROOT
tank 28.2T 11.8T 16.4T - 9% 41% 1.00x ONLINE -
Utvide mdadm RAID10
Det var litt lite informasjon via google om dette var støttet. Men det viser seg etter litt graving at dette går fint så lenge RAID10 settet er opprettet via mdadm 3.3
Selve utvidelsen er rimelig rett frem.
# cat /proc/mdstat

md1 : active raid10 sda3[0] sdc3[2] sdd3[3] sdb3[1]

      195179520 blocks super 1.2 512K chunks 2 near-copies [4/4] [UUUU]
# mdadm --manage /dev/md1 --add /dev/sde3 /dev/sdf3 /dev/sdg3 /dev/sdh3
# mdadm --grow --raid-devices=8 /dev/md1
# cat /proc/mdstat
md1 : active raid10 sdh3[7] sdg3[6] sdf3[5] sde3[4] sda3[0] sdc3[2] sdd3[3] sdb3[1]
195179520 blocks super 1.2 512K chunks 2 near-copies [8/8] [UUUUUUUU]
[>....................] reshape = 0.1% (339584/195179520) finish=9.5min speed=339584K/sec
ODROID-C1 NTP Server
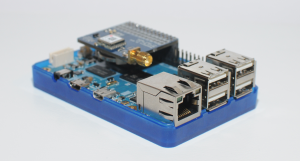 Based on the gps receiver from hab supplies, the work of jgilje and debian jessie I have been able to compile a minimal image which can work as a Stratum-1 ntp server.
The image itself is ~90MB compressed, and contains a minimal installation of debian jessie, kernel from hardkernel with the pps-gpio patch from jgilje. ntp package was recompiled and is held from future updates. ntpd is preconfigured to use NMEA(127.127.20.0) driver with PPS sync. And udev rules to create the apropriate devices for ntpd to use. I also removed all of the dvb drivers in the kernel provided by hardkernel.
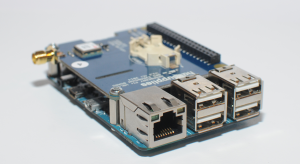 If you want to relocate the PPS signal to a different gpio pin, this can be done by altering the meson8b_odroidc.dts file and compiling it to an apropriate .dtb file.
Image can be written to memory card using win32diskimager or dd, it will use dhcp for network configuration. Only user enabled is root with the password root. Framebuffer should also work, so you can connect it to a screen and configure it locally.
Things to do at first boot. Use fdisk to delete partition 2, and recreate the partition with the same size as the sd-card. Then resize the root partition.
Please note that on cold boot, it will take some time to lock onto the PPS.
Sources:
https://github.com/jgilje/pps-gpio-amlogic
http://ava.upuaut.net/store/index.php?route=product/product&path=59_60&product_id=117
Download:
odroidc1.img
Some ntpd output.
root@odroid-c1:~# ntpq -p

remote refid st t when poll reach delay offset jitter

==============================================================================

+ntp.fnutt.net 192.36.134.17 2 u 5 64 377 11.512 0.230 0.812

+2.81-166-42.cus 85.89.3.25 2 u 36 64 377 4.607 -0.430 0.612

+langbein.monslo 129.242.4.241 2 u 40 64 377 15.449 -1.063 0.953

-ntp-ext.cosng.n 146.213.3.181 2 u 24 64 377 14.528 1.604 1.253

oGPS_NMEA(0) .GPS. 0 l 12 16 377 0.000 -0.001 0.001
root@odroid-c1:~# ntpq -c rl

associd=0 status=0415 leap_none, sync_uhf_radio, 1 event, clock_sync,

version="ntpd 4.2.6p5@1.2349-o Mon May 25 18:52:44 UTC 2015 (1)",

processor="armv7l", system="Linux/3.10.75", leap=00, stratum=1,

precision=-20, rootdelay=0.000, rootdisp=0.354, refid=GPS,

reftime=d90ed892.9bbc5b1d Tue, May 26 2015 11:33:38.608,

clock=d90ed89b.4cfcafe8 Tue, May 26 2015 11:33:47.300, peer=59860, tc=4,

mintc=3, offset=-0.001, frequency=9.542, sys_jitter=0.001,

clk_jitter=0.001, clk_wander=0.000
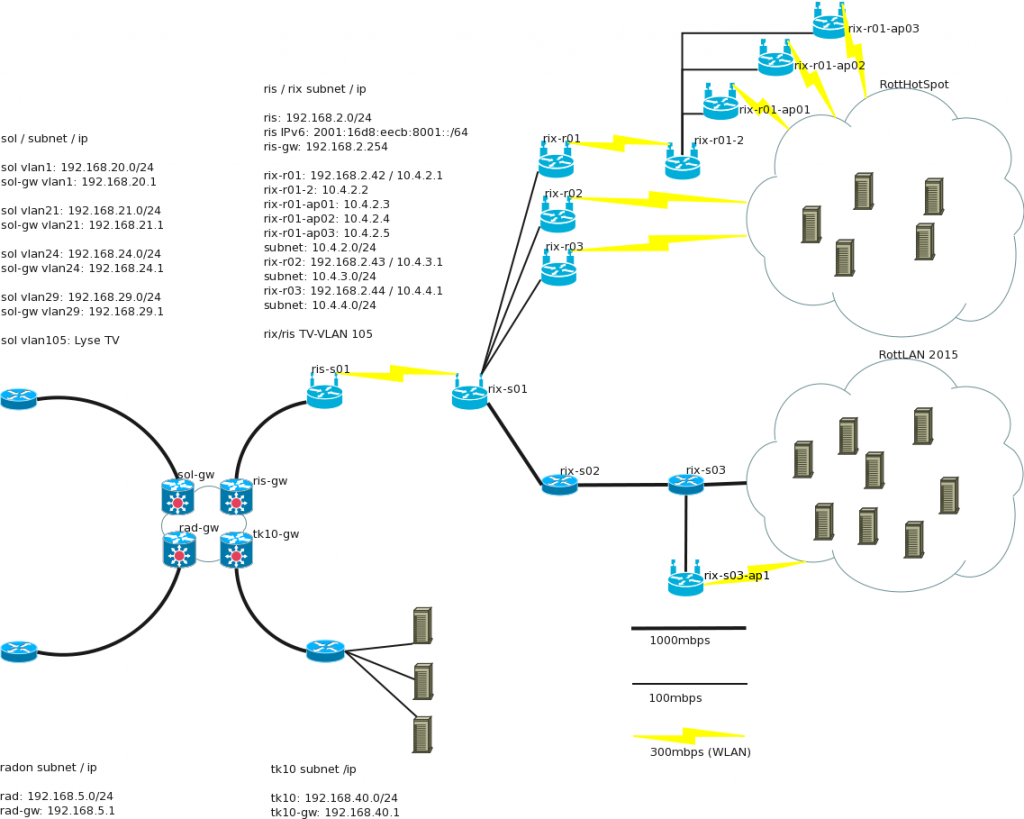
Design RottLAN 2015
Ikke veldig mye har forandret seg siden 2012, men noen nye ting er det.
- Alle får dualstack (IPv4 / IPv6 ) addresser. IPv6 addressene er _helt_ åpne fra utsiden, mens IPv4 addressene er NATet.
- TV VLAN fra Risnes er tatt ut over trådløs link til RIX. Kan hvis ønskelig dras ned til “rix-s03”
